1. a. Installing screen saver and change the monitor resolution by 1280X960
Aim: To install Screensaver and Change the monitory resolution by 1280 X 960.
Procedures:
Step 1: Download the screensaver file to your desktop.
Step 2: Install the screensaver. If it is a .zip file, simply unzip it and run the executable file which will take you through an install process.
Step 3: If your screensaver appears in an .scr or .dll format, you'll need to put it in the System directory.
Step 4: Open "My Computer," open the C
drive, navigate to "Windows," then "SYSTEM." Paste the .scr
or .dll file in that folder, and it will become available.
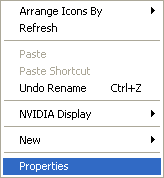
Step 5: Right-click in a blank area of your desktop then select
"Properties."
Step 6: In the dialog box that appears, click on the "Screen Saver" tab.
Step 7: Choose your screensaver from the list of those available in the drop-down menu, adjust any settings specific to that screensaver, then click "OK."
To change your monitor’s resolution – Steps are below:
- Right-click
the desktop, and then click Properties.
- In the
Display Properties dialog box, click the Settings tab.
3.
Move the Screen resolution slider to the left to decrease
the resolution of your monitor. Or move the Screen resolution slider to the
right to increase your monitor’s resolution, Here, 1280X960.
- Click
Apply to have the new resolution take effect.
- If the
Monitor Settings dialog box appears, look at your display. If you like the
new resolution, click Yes. (If you do not like the resolution, click No,
and return to step 3 to try a different resolution.)
- Click OK.
Conclusion: Thus a screensaver is installed and
the monitor resolution is set to 1280X960 successfully.
b. Setting wall papers
Aim: To set the wall paper as desktop background.
Procedures:
1. Click the "Start" and Select "Control Panel."
2. Select "Appearance and Personalization" in the control panel and then click "Personalization."
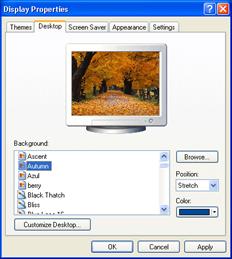
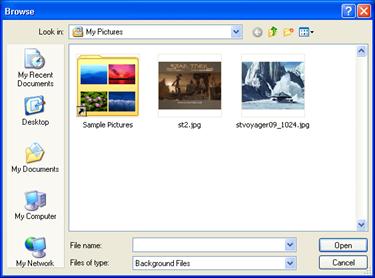
3. Click "Desktop Background" and choose the color or image you want to use as your wallpaper or click "Browse" to search your directory for an image of your own.
4. Use the option "How should the picture be positioned" to direct your selected image either to the center of the screen or to fit the entire screen. Click "OK" to confirm your choice.
5. Click
"Change Background Color" and select the color you want. Click
"OK" to display the color.
Conclusion:
Thus, the wall paper was set as desktop background successfully.
2. a. Creating, moving, deleting and renaming a folder
Aim: To create a new folder in the My Documents folder and then rename , move
the folder and delete it.
Procedures:
To Create a Folder:-----------------------
- Open My Documents.
- Choose File
 NewFolder.
 - A new folder icon appears in My Documents,
with its name highlighted. (The default is New Folder.)
- Type a new, more descriptive name and click
Enter.
To rename a Folder:
- Locate your folder.
- Right-click the folder icon.
- Choose Rename.
- The folder name is highlighted in blue, ready to be retyped.
- Type a new name and press Enter.
OR
- Open your folder.
- Click the folder icon.
- Choose Rename this
folder from the File and Folder Tasks menu.
To delete a Folder:
- Locate your folder.
- Right-click the folder icon.
- Choose Delete.
- A Confirm Folder
Delete dialog box appears asking you if you are sure you
want to send the file to the Recycle Bin.
- Choose Yes.
- The folder is moved to the Recycle Bin.
OR
- Open your folder.
- Click the folder icon.
- Choose Delete this
folder from the File and Folder Tasks menu.
To move a folder
|
v
Click the
folder you want to move. |
|||
|
v
Under File
and Folder Tasks, click Move this folder. |
|||
|
v
In Move
Items, click the new location for the folder, and then click Move.
|
|||
|
Conclusion: Thus, A folder was created and renamed and moved, then deleted it. |
|||
|
|
2) b. Copy, paste and cut a folder/file Aim : To copy , paste and cut a folder or file Procedures: 1.
Open the My Documents or My Computer window, and select the folder or
file that you are moving or copying 2.
Click Edit – Copy or press Ctrl+C to copy or click Edit- Cut or press
Ctrl+X to move it. 3.
In the My documents or My Computer
window, select the folder or disk to which you are moving or copying the
selected folder or file. 4.
Click Edit- Paste or Press Ctrl+V to paste it into the
destination folder. Conclusion: Thus a file/ folder was selected and copied and pasted into another location. 2) c. Displaying the properties for a file or folder
|
||
|
|
|
3. a. Restoring files and folders from Recycle bin
Aim:
To restore files and folders from Recycle bin.
Procedures:
1. Open the Recycle Bin by double-clicking on its icon on the Desktop.
2. Locate and then select the file(s) and/or folder(s) you need to restore.
3. Right-click on the selection and then choose Restore.
4. These files and folders will now be restored to their original locations.
Conclusion: Following the above procedure, files and folders were restored from Recycle bin.
3.b. Creating short cuts for folder/file
Aim: To create short-cuts for a file or folder.
Procedure:
- Right-click an open area on the
desktop, point to New, and then click Shortcut.
- Click Browse.
- Locate the program or file to
which you want to create a shortcut, click the file, click Open,
and then click Next.
- Type a name for the shortcut.
- and then click Finish button.
To create a shortcut to a folder,
1. right-click the folder, and then click Create Shortcut. This creates a shortcut to the folder you selected.
2. To move the shortcut, select it, and then drag it to a new location.
Conclusion: Successfully created the short-cut on desktop. A shortcut is a quick way to start a frequently used program or open a file or folder without having to go to its installed location.
3.C) Finding a file or folder by name
Aim: To search for a file or folder by
name
Procedure:
- Click Start, and then click
Search.
- In the Search Companion
dialog box, click All files and folders.
- Type part or all of the name of
the file or folder
- In the Look in box, click
the drive or drives, folder, that you want to search.
- Click Search.
Conclusion: Thus, A file or folder was found by
its name correctly.
3) d. Selecting and moving two or more files/folders using mouse
Aim: To select and move two or more files/folder
using mouse
Procedure:
1. Open the folder that contains the files or folders you want to select.
2. Select the files or folders using any one of these methods:
o To select a consecutive group of files or folders, click the first item, hold down the SHIFT key, and then click the last item.
o To select a consecutive group of files or folders without using the keyboard, drag the mouse pointer to create a selection around the outside of all the items you want to include.
o To select nonconsecutive files or folders, hold down CTRL, and then click each item you want to select.
o To select all of the files or folders, on the toolbar, click Organize, and then click Select All.
3. To move the select files/folders, drag the mouse pointer and drop into another location / folder.
Conclusion: Selected and moved the multiple files / folders using mouse successfully.
3. e. Sorting folders/files.
Aim: To sort folders/files.
Procedure:
1. Click
Start, point to All Programs, point to Accessories, and
then click Windows Explorer.
2. In
Windows Explorer, right click to set Folder View and Sort by as per your choice
3. After
click on Apply to Folders a message will pop up so just select Yes
4. Click
on OK on Folder View page and you are done with make Folder View and Sort by
settings default
Conclusion: Files and folders is sorted and verified.
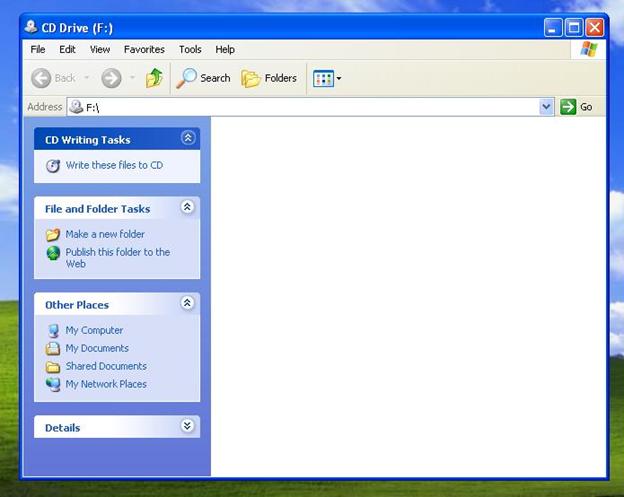
4. Copying files into CD/DVD
Aim: To copy files and folders to a CD/DVD
Procedure:
|
1. Insert a blank, writable CD into the CD/DVD recorder. |
|
2. Open My Computer |
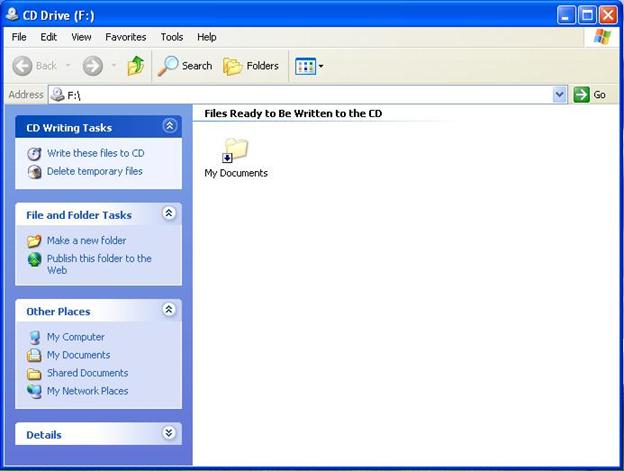
|
3. Click the files or folders you want to copy to the CD. To select more than one file, hold down the CTRL key while you click the files you want. 4. Then, under File and Folder Tasks, click Copy this file, Copy this folder, or Copy the selected items. |
|
5. In My Computer, double-click the CD recording drive. Windows displays a temporary area where the files are held before they are copied to the CD under Files Ready to be Written to the CD. |
|
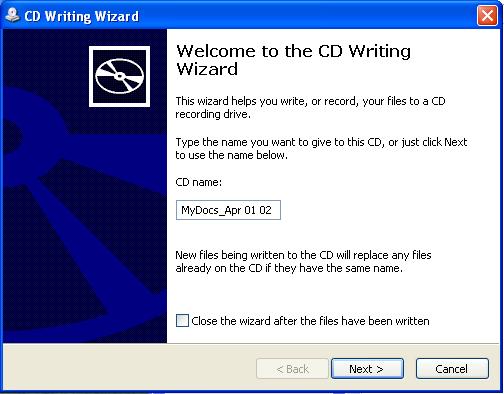
6. Under CD Writing Tasks, click Write these files to CD. Windows displays the CD Writing Wizard. Follow the instructions in the wizard. |
Conclusion: Thus, the select files/folders were copied to CD/DVD.


5. a. Starting and Running Programs
Aim: To start and run programs
Procedure:
|
1. Right-click Start button. 2. Click Explore. 3. Locate and open the folder where the application (the programming file) is located. 4. Select the application and right-click and then select Open to run the application. 5. Or Double-click the application file. |
|
Application file is the executable program file which has the file extension .exe. |
Conclusion: Thus, the programs are started and run.
5) b. Switching between applications
Aim: To switch between applications.
Procedure:
|
1. Open two or more programs. 2. Press and hold Alt+Tab. This will open a small box, revealing all opened programs. 3. Release the Tab key but keep Alt key pressed down. 4. Thus, Hold down the Alt key and then press the Tab key repeatedly until the application window you want is selected. 5. Release the Alt key. Now it switches to whichever program is selected. |
Conclusion: It can quickly switch between those running applications in Windows XP.
6. Making the taskbar wider and hiding the taskbar
Aim: To make the taskbar wider and hiding the taskbar.
Procedure:
To make the taskbar wider
|
|
1. To alter the size of your Windows desktop taskbar, firstly make sure that the taskbar is not locked. 2. If it is locked, right click any empty space on the taskbar and Click 'Lock the taskbar' once to unlock it. 3. position your mouse cursor directly over any vacant space on the taskbar 4. At this point, click and drag the taskbar's edge up to make it bigger. |
To hide the taskbar
Conclusion: Thus the taskbar was making wider and hiding it correctly.
7.Recording and saving an audio file
Aim: To record and save an audio file.
Procedure:
|
1. Make sure you have an audio input device, such as a microphone, connected to your computer. 2. Click Start - All Programs -- Accessories, and then click Sound Recorder. 3. Click Start Recording. 4. To stop recording audio, click Stop Recording. 5. Click the File name box, type a file name for the recorded sound, and then click Save to save the recorded sound as an audio file. |
Conclusion: Thus, it was recorded and saved an audio file.
8. Set/Change the date and
time.
Aim: To set and change the date and time.
Procedure:
|
1. To open Date and Time, click Start, click Control Panel, click Date, Time, Language, and Regional Options, and then click Date and Time. 2. Or, open the Date and Time dialog box by double-clicking the clock on the taskbar. 3. On the Date & Time tab, select the item you want to change.
|
||||||
Conclusion: Thus, it was set the date and time correctly.
9. Browsing and searching a topic.
Aim: To browse and search a topic over internet.
Procedure:
|
1. Open the browser, Internet Explorer or Mozilla Firefox on the Desktop 2. Look for the address bar. Click inside of it. The URL (website address) will become highlighted. 3. Press backspace or delete to erase the information inside the address bar. 4. Type in a search engine. E.g. google.co.in or yahoo.com 5. Press Enter (or Return), or click the "GO" button, 6. Look for a text box with a button that says "Search" beside it. Type in what you are looking for. Examples: mobile phones for sale, books – MS Office 2007 7. Either press Enter (or Return), or click the Search button. 8. Look for and click the link or image that is most relevant to what you are looking for. It will take you the correct web page and topics you want. |
Conclusion: In Internet, the topic was browsed and searched successfully.
10. Creating an E-Mail id and send a mail to friend
Aim: To create an E-mail id and send a mail to friend.
Procedure:
To Create an E-mail id.
|
1. Open the browser, Internet Explorer or Mozilla Firefox on the Desktop. 2. Type www.gmail.com in the address bar. 3. Click on the "Create an Account" button, which is located below the text "New to Gmail? It's free and easy." 4. Create your email ID by entering your personal information in the "Create an Account" page. Enter your first and last name and then your desired email ID. 5. Click on the "check availability" button below your name if you would like to see if your user ID is available before you proceed. 6. Choose a password, and then re-enter it for accuracy. Select a security question to be used to verify your identity from the "Choose a Question" pull-down menu button. Type in an answer to the security question. 7. Enter an optional recovery email address (alternative email address) if you have one. Enter your location and your birthday. Type in the letters you see listed in the "Word Verification." 8. Agree to Google's terms of service by clicking on the "I accept. Create my account" button at the bottom. 9. Complete the sign-up process by logging into your new account at www.gmail.com. 10. Enter the user name you selected and the password and your email will be activated. To send a mail to friend. 1. Log in to your Gmail account using your email address and password. 2. Click "Compose Mail". 3. Enter an email address (your friend email address) in the "To" field. Typing an entry in the "Subject" field is optional. 4. And type your email message. When finished, click "Send" to send an email on Gmail. |
Conclusion: Thus, an Email id was created and then sent a mail to one of my friends successfully.
